Sunday, August 24, 2014

Safe Sushi! (no raw fish) Plus a recipe for sticky rice at the way bottom . . .

Recently my family has developed a tradition.  Whenever a family member has a birthday, we go out to dinner at Rice Temptation, our local sushi restaurant, and eat a delicious meal of seafood (and sticky rice).  They have such delicious sushi and display it so beautifully that it inspired me to make my own (along with sticky rice, there's a recipe at the way bottom).  But there was only one problem; there isn't anywhere to get raw sushi grade seafood.  I wasn't going to let this little problem to get in the way of homemade sushi, nor did I want to make vegetarian sushi, so I decided to make sushi with cooked seafood!


You can fill sushi with basically anything you want, as long as you don't overfill the rolls, which leaves endless possibilities.  I made four different types of sushi; California Roll (chopped crab mixed with wasabi, sliced avocado, and julienned cucumber & carrot), Shrimp & Avocado Roll (chopped shrimp mixed with wasabi, sliced avocado, sliced fresh ginger, and julienned cucumber carrot & bell pepper), Omelet & Asparagus Roll (sliced omelet, asparagus, green onion, and julienned cucumber, carrot, & bell pepper), & Philadelphia Roll (smoked salmon, cream cheese, and julienned cucumber carrot & bell pepper).  I used smoked salmon, whole shrimp, sliced avocado, black sesame seeds, and peels of carrots, cucumbers, and bell peppers for garnish on top of my sushi slices.  I also decorated my sushi platter with Radish Flowers and iced green onions.


You do need 3 specific things for making sushi at home.
  1. Sushi rice (short grain rice).  You can find sushi rice at your local grocery store, they even sell        brown short grain at Trader Joe's!
  2. Nori sheets.  Nori is the special seaweed that is used in sushi, you can find it at Cost Plus or 99 Market.
  3. A bamboo rolling mat.  You can substitute a rolling mat with a folded kitchen towel, but the bamboo mats work better and are sold at Cost Plus for only $1.99.


Once you have all your ingredients prepped, it's time to roll!

Cover your rolling mat in plastic wrap (this prevents the mat from getting dirty).  Lay a sheet of nori on the mat, rough side up, then spread a handful of rice evenly across the rough side of the nori.  If you keep your hands wet, the rice won't stick so much.

If you want to get fancy you can flip the nori and rice over so that the rice is facing the mat (this makes the inside-out rolls they serve in restaurants), or you can leave it with the rice on top to make regular seaweed-on-the-outside rolls.

Place a thin line of your ingredients on the upper side of the nori/rice sheet.

Use the bamboo mat to tightly roll up the ingredients, incasing the fillings in nori and rice.  This should create a long, relatively thin roll (about 2 inches).


Use a wet, sharp knife to cut off about ¼ inch of the roll on each end, then slice the roll into eighths, wetting it repeatedly in-between slices.

Repeat this process with all of your ingredients, then transfer the sliced rolls to a large platter and decorate with your desired garnish.

I served my sushi with Asian Noodle Salad in Chinese cabbage cups alongside asparagus and baby broccoli for a perfect paring of flavors.  Maybe my family's new tradition will be to make sushi on birthdays!


If you have any leftover sushi rice, you can add some sugar to it and use it like sticky rice.  Just use an ice cream scoop to shape it into balls, then drizzle with coconut milk and serve alongside your favorite tropical fruits!


To see more of my pictures you can find me on Instagram at @audreygracephotography.

Saturday, August 23, 2014

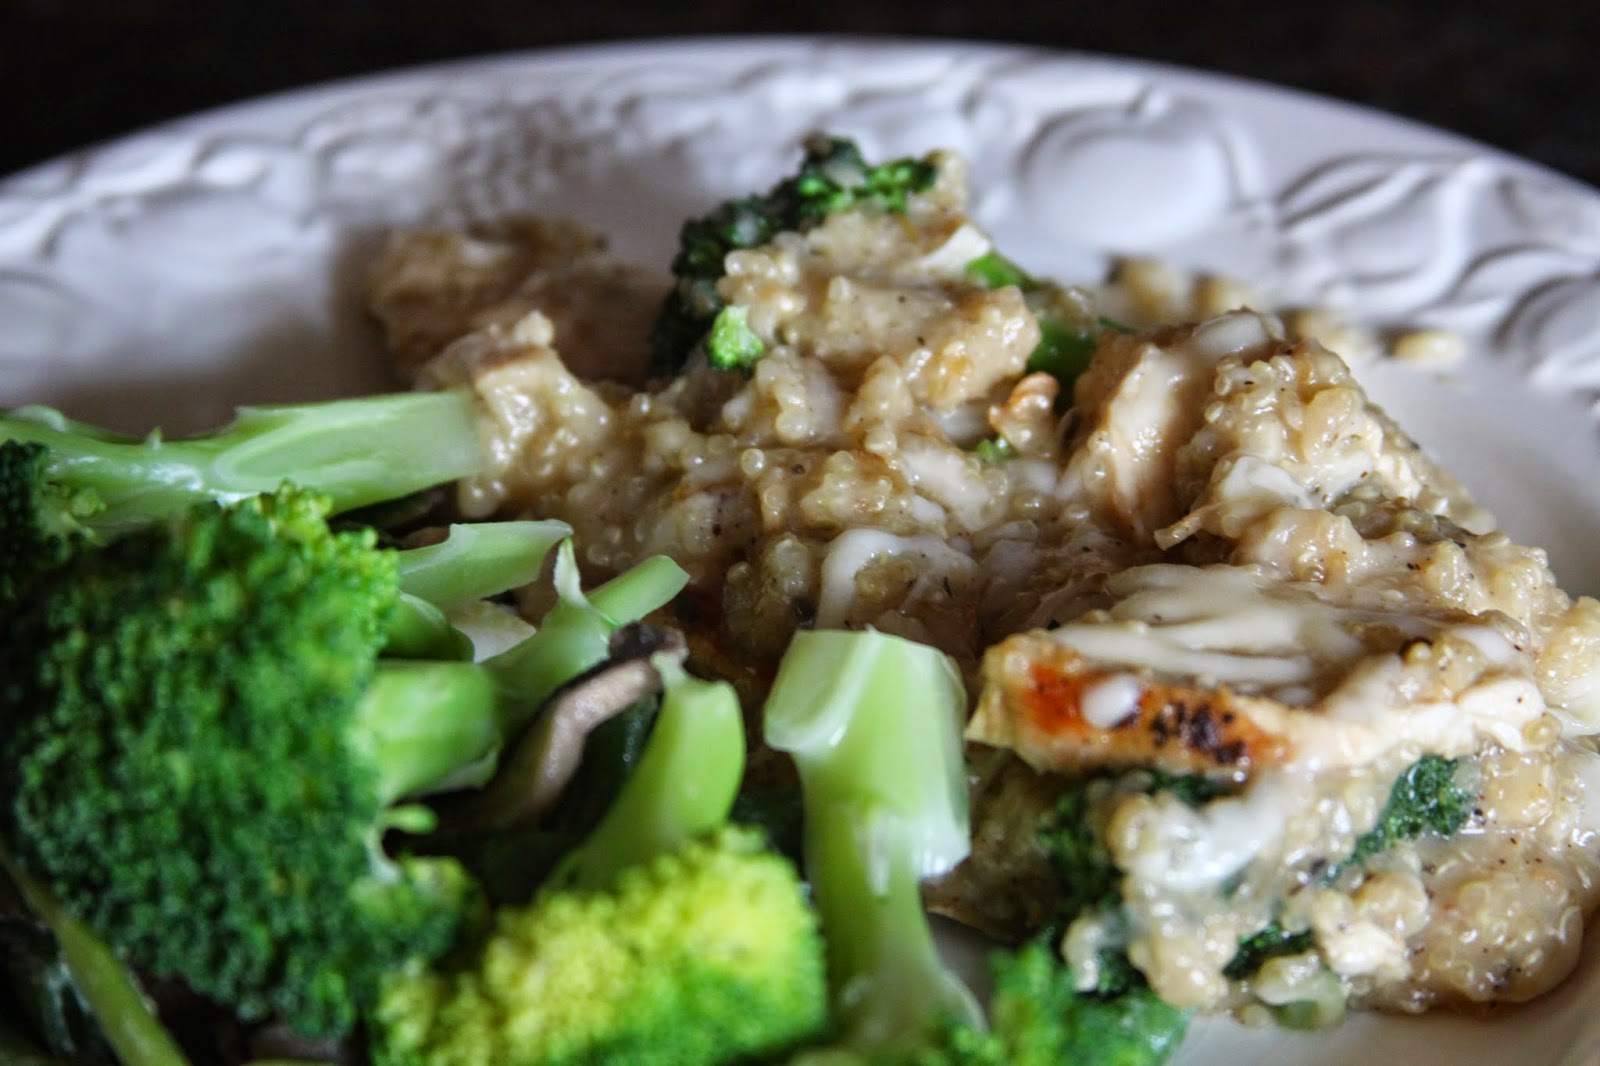
Creamy Chicken Quinoa & Broccoli Casserole

Usually I don't like casseroles because they're all gooey and cheesy, but this one has broccoli and quinoa, so it's kind of an exception.  I found the original recipe for this dish when I was browsing Pinterest, but of course I made some changes to the recipe (like I always do)!  You can find the original recipe on Pinch of Yum, along with the gorgeous picture (showed below) that inspired me to make this casserole.
Pinch of Yum's Creamy Chicken Quinoa & Broccoli Casserole

Here's the recipe that I used to make my version of this easy and delicious casserole.

1 lb. chicken breasts
2 TBSP olive oil
1 ½ tsp thyme
½ tsp oregano
½ tsp basil
½ tsp pepper
½ tsp salt
2 cups chicken stock
1 cup 2% milk
½ cup flour
2 cups water
1 cup uncooked quinoa or grain mix from Trader Joe's
3 cups broccoli florets
¼ cup shredded cheese of your choice
Olive Oil Spray from Trader Joe's

Coat the chicken in the olive oil, oregano, basil, ½ tsp of the thyme, ¼ tsp of the pepper, and ¼ tsp of the salt.  Marinate for at least 2 hours.

In a preheated pan, cook the chicken until it reaches 160* in its thickest part.

Cool the chicken, then slice into thin strips.

Preheat the oven to 400* and generously spray a 9x13 pan with the olive oil spray.

Put the chicken broth and ½ cup of the milk in a small pot and bring to a low boil.  Mix the remaining ½ cup milk with the leftover 1 tsp thyme, ¼ tsp pepper, and ¼ tsp salt.  Combine both the boiling mixture and the flour mixture and whisk into a smooth, creamy sauce.

Mix the creamy sauce with the quinoa and 1 cup of water, then pour the mixture into the prepared baking dish.  Lay the chicken strips in the dish and bake for 30 minutes until the mixture has thickened.
 
While the quinoa/chicken mixture is cooking, cook the broccoli in boiling water for 1 minute, then thoroughly drain.

Once the quinoa/chicken mixture has cooked, remove it from the oven, mix in the broccoli and ½ cup of water, then sprinkle with cheese and bake for 5 more minutes, or until the cheese is melted.

Once the cheese is melted, remove the casserole from the oven and enjoy it alongside a salad or extra broccoli!


To see more of my pictures you can find me on Instagram at @audreygracephotography.

Friday, August 22, 2014

Grilled Salmon with a Wilted Spinach Salad and Crispy Oven-Baked Potato Fries

During the summer, we can only buy small tri-colored potatoes, because none of the other kinds will fit in the fridge.  Now obviously you wouldn't want to mash tri-colored potatoes, first that would be a waste of their individual colors, and second the mashed potatoes would come out a horrible color.  So throughout most of the summer, when we have potatoes we coat them in olive oil and bake them in the oven so they get nice and crispy without being fried.  You can absolutely make these fries with another kind of potato, but I always use the tricolored because they come out so pretty!

Before you read the ingredients list and totally freak out, let me just tell you that I've separated it and the instructions into 4 parts; the potato fries, the salmon, the salad, and the dressing.  Many ingredients are listed multiple times, but it's much easier listed this way, trust me.

Salmon
4 pieces salmon from Trader Joe's (about 1 pound)
1 tsp salt
1 tsp pepper
⅛ cup balsamic vinegar

Potatoes
2.5 lb small tri-colored potatoes from Trader Joe's, or potatoes of your choice
olive oil
1 TBSP dried thyme
1 tsp salt
1 tsp pepper
1 lemon, juiced

Salad
16 oz. green beans, topped and cut into thirds (I used organic green beans from Trader Joe's and they were delicious!)
12 oz. mushrooms, sliced
1 tsp salt
1 tsp pepper
2 cloves garlic, minced
10 oz. baby spinach
2 boiled eggs, peeled and chopped

Dressing
½ cup balsamic vinegar
¼ cup olive oil
1 boiled egg, peeled
10 Kalamata olives from Trader Joe's
1 lemon, juiced
2 tsp salt
1 tsp pepper
1 tsp sugar


For the salmon and potatoes:

Drizzle the salmon with the ⅛ cup balsamic vinegar, then sprinkle with the salt and pepper.  Let marinate for at least 4 hours.

Wash and quarter the potatoes, then toss them in enough olive oil to coat them completely, along with the thyme, salt, pepper, and lemon juice.

Now I know these are called Crispy Oven-Baked Potato Fries, but I decided to try them in a grill basket on the BBQ this time.  Normally I bake them in a large pan with the oven at 400* until they have turned a golden brown and are crispy on all sides (you have to toss them occasionally).

But anyway, if you are making yours on the BBQ, cook them in a grill basket until they are golden brown and crispy all over.


When the potatoes are almost done, put the marinated salmon on the BBQ and grill it in a slotted dish until it flakes easily and the skin is crispy.


For the salad:

Bring a large pot of salted water to a boil, then cook the green beans until they are tender.  Mine only took 5 minutes, but they can take anywhere up to 15 minutes.  Once the beans are cooked, drain them into a colander and cover with ice to help them cool.  When they are completely cool, remove the ice and let them finish draining.

Preheat a large pan coated in olive oil.  Add the mushrooms, garlic, salt, and pepper and sauté until the mushrooms are golden brown and meaty in texture.  Turn off the heat and let them cool.

Add the green beans, spinach, and eggs to the cooled mushrooms, then thoroughly mix until all the ingredients are combined.

For the dressing:

Blend together the vinegar, oil, egg, olives, lemon juice, salt, pepper, and sugar into a creamy dressing.

Serve the grilled salmon over a bed of wilted spinach salad alongside some crispy oven-baked potato fries, then drizzle with the creamy dressing.  If desired, add some capers for garnish.


To see more of my pictures you can find me on Instagram at @audreygracephotography.

Thursday, August 21, 2014

Mini Mango Muffins

When I say 'Mango Bread' what image pops into your head?  I know, I know, I had the same reaction.  But I never reject an idea because of my initial thoughts, so when I saw a recipe for Mango Bread in my Vitamix cookbook, I was willing to give it a try.  While I was making the batter I thought, "Mango Bread is all fine and good, but how much cuter would Mini Mango Muffins be!"  So I decided to use the recipe to make 60 mini muffins instead of 1 loaf of bread.  If you don't have a Vitamix, don't worry.  You can easily make this recipe with a different blender or a food processor.

Although I found this recipe for Mango Bread in my Vitamix cookbook, I replaced the vegetable oil with coconut oil, added the flaked coconut, left out the salt, and made it in mini muffin pans instead of one large loaf pan.

2 cups flour
2 tsp cinnamon
½ tsp baking soda
½ tsp baking powder
¾ cup sugar
2 eggs
2 TBSP coconut oil
1 mango, pitted and peeled
1 tsp lemon juice
Unsweetened flaked coconut (you can try shredded, but it might burn)

In a large bowl, thoroughly mix together the flour, cinnamon, baking soda, and baking powder.

Put the sugar, eggs, coconut oil, mango, and lemon juice into a Vitamix, blender, or food processor and blend into a smooth, creamy mixture.

Make a well in the dry ingredients, then add the mango mixture.

Thoroughly mix together the wet and dry until you have a thick batter with no lumps.

Use coconut oil spray to lightly coat enough pans to make 60 mini muffins.  With a small ice cream scoop, spoon the batter into the individual cups, then sprinkle the tops with flaked coconut.

Bake in a 350* oven for 10 minutes, or until a toothpick comes out clean.

Cool the muffins in their pans for 5 minutes, then use a small spatula to transfer them onto a cooling rack.

These delicious bite-sized muffins make a perfect on-the-go snack.  For a tropical dessert, try serving them alongside raspberries, passion fruit, and shredded coconut! 


To see more of my pictures you can find me on Instagram at @audreygracephotography.